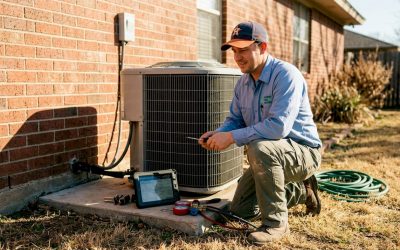
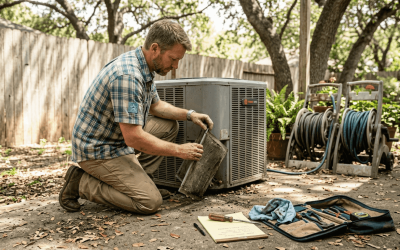
Installing a new HVAC system is a major upgrade that can totally change how comfortable your home feels year round. Most people focus on picking the right unit and crossing their fingers everything works out. But here is something that might surprise you. Nearly one third of new HVAC systems are installed incorrectly according to industry reports, leading to wasted money and ongoing comfort problems. That flips the script on what really matters and shows that how you install your HVAC is just as important as the equipment you choose.
Table of Contents
- Step 1: Assess Your Current HVAC Needs
- Step 2: Choose The Right HVAC System For Your Space
- Step 3: Prepare The Installation Area
- Step 4: Install The Indoor And Outdoor Units
- Step 5: Connect Electrical And Ductwork Components
- Step 6: Test The System For Optimal Performance
Quick Summary
| Key Point | Explanation |
|---|---|
| 1. Assess your HVAC needs carefully | Measure your space, review insulation, and evaluate local climate to identify specific heating and cooling requirements. |
| 2. Choose the right HVAC system type | Consider different systems like central air, ductless mini splits, and heat pumps based on your home’s layout and energy efficiency goals. |
| 3. Prepare the installation area adequately | Clear the space and check electrical and structural integrity to prevent installation complications and ensure efficient operation. |
| 4. Verify electrical and ductwork connections | Ensure proper electrical circuits and airtight ductwork are installed, as these factors greatly impact system efficiency and longevity. |
| 5. Test the system for optimal performance | Conduct comprehensive testing across all modes to confirm that the system operates efficiently and reliably under varying conditions. |
Step 1: Assess Your Current HVAC Needs
Starting your HVAC installation journey requires a comprehensive understanding of your specific heating and cooling requirements. This initial assessment is crucial for determining the right system that matches your home’s unique characteristics and your personal comfort needs. Before purchasing any equipment, you’ll need to evaluate several critical factors that impact your HVAC performance and efficiency.
Evaluating Home Size and Heating/Cooling Requirements
The foundation of your HVAC assessment begins with precise measurements of your living space. Square footage plays a significant role in selecting an appropriately sized system. Professional HVAC technicians typically recommend calculating the heating and cooling load based on your home’s total area, insulation quality, window placement, and local climate conditions. For instance, a 1500 square foot home in Texas will have dramatically different requirements compared to a similarly sized home in a cooler northern region.
Key elements to consider include your home’s current insulation quality, number of windows, ceiling height, and existing ductwork condition. These factors directly influence the system’s efficiency and performance. Check out our guide on understanding HVAC maintenance to gain deeper insights into system requirements.
Additionally, consider your household’s specific comfort preferences. Do you have family members with temperature sensitivities? Are there rooms that consistently feel warmer or cooler than others? These nuanced details help technicians recommend systems with zoning capabilities or supplemental features that ensure balanced temperature distribution throughout your home.
Energy Efficiency and Budget Considerations
Modern HVAC systems offer varying levels of energy efficiency, represented by SEER (Seasonal Energy Efficiency Ratio) ratings. Higher SEER ratings indicate more efficient systems but also come with increased upfront costs. Homeowners should balance initial investment with long term energy savings. A professional energy audit can provide precise recommendations tailored to your specific needs, helping you select a system that offers optimal performance without unnecessary expenses.
Successful HVAC installation starts with thorough preparation. By meticulously assessing your home’s unique characteristics and comfort requirements, you’ll set the stage for a perfectly matched heating and cooling solution that delivers comfort, efficiency, and long term value.
Step 2: Choose the Right HVAC System for Your Space
Selecting the optimal HVAC system represents a critical investment in your home’s comfort and energy efficiency. This pivotal decision goes far beyond simply picking the most expensive or popular model. You need a strategic approach that considers your unique home environment, budget constraints, and long term performance expectations.
Understanding System Types and Performance Characteristics
The HVAC marketplace offers multiple system configurations to match diverse residential requirements. Central air conditioning systems remain popular for whole home cooling, providing uniform temperature distribution through comprehensive ductwork. Alternatively, ductless mini split systems offer targeted cooling and heating for specific zones, making them ideal for homes with unique architectural layouts or rooms with distinct temperature needs. Learn more about split type air conditioning options to understand these flexible solutions.
Heat pumps represent another innovative option, delivering both heating and cooling capabilities in a single integrated system. These units excel in moderate climates, transferring heat rather than generating it, which can significantly reduce energy consumption. Their versatility makes them attractive for homeowners seeking an all in one temperature management solution.
The table below compares the main types of HVAC systems discussed in the guide to help you choose the most suitable option for your home environment and needs.
| HVAC System Type | Key Features | Ideal For | Energy Efficiency |
|---|---|---|---|
| Central Air Conditioning | Uniform temperature distribution with ductwork | Whole-home, consistent comfort | Varies by SEER |
| Ductless Mini Split | Zoned control, no ducts required | Homes with unique layouts or additions | High |
| Heat Pump | Provides both heating and cooling; transfers heat | Moderate climates, integrated solutions | Very High |
Matching System Specifications to Home Requirements
Careful system selection demands precise calculations beyond square footage. Professional HVAC technicians utilize complex load calculations that factor in insulation quality, window orientation, ceiling height, local climate patterns, and household occupancy. Energy efficiency ratings like SEER (Seasonal Energy Efficiency Ratio) provide critical performance indicators. Higher SEER ratings indicate more advanced systems that consume less electricity while delivering consistent comfort.
Verification Checklist for System Selection:
- Confirm system matches total square footage
- Verify SEER rating meets energy efficiency standards
- Ensure compatibility with existing home infrastructure
- Check manufacturer warranty and service agreements
By methodically evaluating these factors, you transform HVAC system selection from a potential guessing game into a calculated, confident decision. Your goal is not just purchasing equipment, but investing in a comfort solution precisely tailored to your home’s unique characteristics.
Step 3: Prepare the Installation Area
Preparing the installation area is a critical phase that sets the foundation for a successful HVAC system deployment. This step involves creating an optimal environment that ensures your new system will operate efficiently, safely, and with minimal complications. Proper preparation can prevent potential installation challenges and protect your significant equipment investment.
The preparation process begins with a thorough evaluation of the designated installation spaces. For indoor units, this means clearing a substantial area around the planned location, removing any obstacles that might impede airflow or system access. Exterior installation sites require equally meticulous preparation, focusing on creating a stable, level surface that can support the outdoor condensing unit. Our guide on heating systems offers additional insights into strategic equipment placement.
Indoor preparation involves more than just physical clearing. You’ll need to verify several critical infrastructure elements. Electrical circuits must be capable of supporting the new HVAC system’s power requirements, which means checking circuit breaker capacity and ensuring proper voltage compatibility. Older homes might require electrical system upgrades to accommodate modern HVAC equipment safely.
Essential Preparation Checklist:
- Clear a minimum 2 foot perimeter around indoor and outdoor unit locations
- Verify electrical circuit amperage and voltage specifications
- Ensure unobstructed access for technicians and future maintenance
- Remove any combustible materials near potential installation zones
- Check structural integrity of mounting surfaces
Ductwork represents another crucial preparation element. Existing ductwork needs comprehensive inspection for leaks, damage, or inefficient routing. Some installations might require partial or complete duct system redesign to maximize airflow and system efficiency. This step often involves professional evaluation to identify potential optimization opportunities.
Maintaining a clean workspace is paramount during HVAC installation. Dust, debris, and random household items can interfere with precise equipment positioning and potentially damage sensitive components. Professional installers will typically request a clear, organized area that allows unimpeded access and movement during the installation process. By meticulously preparing your installation area, you significantly increase the likelihood of a smooth, successful HVAC system deployment.
Below is a checklist table summarizing the key preparation steps to ensure your HVAC installation area is ready for a smooth, efficient process.
| Preparation Task | Description | Verification Required? |
|---|---|---|
| Clear 2-foot perimeter | Remove obstacles around unit locations, indoors and outdoors | Yes |
| Verify electrical circuits | Check amp and voltage specs against new HVAC system needs | Yes |
| Ensure technician access | Confirm unobstructed pathways for installation and future maintenance | Yes |
| Remove combustible materials | Prevent fire hazards near installation zones | Yes |
| Inspect mounting surfaces | Make sure surfaces are level and structurally sound | Yes |
| Inspect existing ductwork | Check for leaks, damage, or inefficient routing | Yes |
| Maintain clean workspace | Remove dust and debris to protect equipment | Yes |

Step 4: Install the Indoor and Outdoor Units
The installation of indoor and outdoor HVAC units represents a complex process requiring precision, technical expertise, and careful coordination. This critical stage transforms your carefully selected equipment into a functional home comfort system. Professional technicians approach this step with methodical attention to detail, understanding that even minor installation errors can significantly impact system performance and longevity.
Installing the outdoor condensing unit demands a strategic approach. Location is paramount, requiring a level, stable surface that provides adequate clearance from vegetation, structures, and potential debris sources. Typically, technicians will use a concrete pad or robust mounting brackets to ensure the unit remains perfectly level. Proper positioning prevents unnecessary vibration, reduces potential mechanical stress, and optimizes airflow around the equipment.
Explore our detailed guide on air conditioning repair tips to understand the nuanced challenges of HVAC system installation. The indoor unit installation presents equally intricate considerations. Wall mounted units require precise mounting brackets, ensuring absolute stability and perfect alignment. Technicians carefully mark mounting points, drill precise anchor holes, and secure the unit with industrial grade fasteners that can support the system’s weight and withstand potential vibration.
Critical Installation Verification Checklist:
- Confirm outdoor unit is perfectly level
- Verify indoor unit mounting bracket is securely fastened
- Check refrigerant line connections for potential leaks
- Ensure electrical connections meet manufacturer specifications
- Validate proper clearance around both indoor and outdoor units
Refrigerant line connection represents a particularly delicate aspect of the installation process. These copper lines must be meticulously routed, avoiding sharp bends or potential damage points. Technicians use specialized tools to create precise connections, applying appropriate insulation and sealants to prevent energy loss and maintain optimal system efficiency. Vacuum pumping and pressure testing become crucial steps, ensuring the system is completely sealed and ready for operation.
The final stage involves comprehensive system calibration. Technicians will configure thermostat settings, test operational sequences, and verify that each component communicates seamlessly. This meticulous approach transforms individual components into a harmonious, high performance HVAC system tailored precisely to your home’s unique comfort requirements.

Step 5: Connect Electrical and Ductwork Components
Connecting electrical and ductwork components represents the intricate neural network of your HVAC installation process. This step transforms individual equipment pieces into a cohesive, functioning system that will regulate your home’s temperature and air quality. Professional precision becomes paramount, as improper connections can compromise system efficiency, safety, and long term performance.
Electrical connections demand extraordinary attention to detail. Voltage compatibility and circuit capacity are critical considerations that extend beyond simple plug and play installation. Technicians carefully evaluate existing electrical infrastructure, ensuring the circuit can handle the specific power requirements of your new HVAC system. This might involve upgrading circuit breakers, installing dedicated electrical lines, or modifying your home’s electrical panel to accommodate the new equipment’s specifications. Our heating system resources provide additional insights into electrical system preparedness.
Essential Connection Verification Steps:
- Confirm circuit breaker amperage matches system requirements
- Verify proper grounding of all electrical connections
- Check voltage compatibility between system and home electrical infrastructure
- Inspect wire insulation and connection points for potential vulnerabilities
- Validate thermostat wiring configuration
Ductwork connections represent an equally sophisticated process. Proper duct installation involves more than simply connecting metal segments. Technicians focus on creating an airtight, efficiently routed network that minimizes air resistance and maximizes airflow. They carefully seal connection points using specialized metallic tapes and mastic compounds, preventing air leakage that could dramatically reduce system efficiency.
The intricate process also involves comprehensive system calibration. Technicians will use advanced diagnostic tools to measure airflow rates, test electrical connections, and verify that each component communicates seamlessly. Pressure testing becomes crucial, identifying potential leaks or performance limitations before the system becomes fully operational. By meticulously addressing these detailed connection requirements, you ensure your HVAC system will deliver optimal comfort, energy efficiency, and reliability for years to come.
The goal extends beyond mere installation—it’s about creating a sophisticated, integrated home comfort solution tailored precisely to your specific environmental needs.
Step 6: Test the System for Optimal Performance
System testing represents the culmination of your HVAC installation journey, transforming carefully executed technical work into a fully functional home comfort solution. This critical phase goes beyond simple operational verification, focusing on comprehensive performance evaluation that ensures your investment delivers maximum efficiency, reliability, and comfort.
Initial testing begins with a systematic approach to operational sequences. Technicians will progressively activate different system modes heating, cooling, and fan operations to verify seamless transitions and consistent performance. Temperature differential measurements become crucial during this stage, confirming that the system can achieve and maintain desired indoor temperatures across various settings. Explore our detailed air conditioning repair insights to understand the nuanced testing procedures professionals employ.
Comprehensive Performance Verification Checklist:
- Validate temperature consistency across different zones
- Check thermostat response and programming accuracy
- Measure airflow volume at each register
- Listen for unusual operational sounds
- Verify electrical system integration
Refrigerant pressure represents another pivotal testing parameter. Technicians use specialized manifold gauges to confirm precise refrigerant levels, ensuring the system operates within manufacturer specified parameters. Slight pressure variations can dramatically impact cooling efficiency, making this measurement critical for long term system performance. Technicians will carefully document these readings, comparing them against original manufacturer specifications to identify any potential calibration requirements.
Electrical system integration testing involves comprehensive diagnostic procedures. Professionals will verify voltage stability, check electrical connection integrity, and confirm that circuit breakers respond appropriately during system startup and shutdown sequences. This meticulous approach prevents potential electrical complications that could compromise system performance or create safety risks. By conducting these detailed tests, you transform your HVAC installation from a collection of components into a precisely tuned, highly efficient home comfort system capable of delivering consistent, reliable temperature management tailored to your specific environmental needs.
Refer to the table below for a concise checklist of performance verification steps to complete after your HVAC system installation for optimal operation and peace of mind.
| Performance Test Step | What to Check | Why It Matters |
|---|---|---|
| Temperature Consistency | Uniform temps across zones | Confirms balanced system coverage |
| Thermostat Response | Accurate programming & readings | Ensures user control & reliability |
| Measure Airflow | Volume at each supply register | Assures comfort & system efficiency |
| Listen for Unusual Sounds | Uncommon noises during operation | Detects installation or equipment issues |
| Refrigerant Pressure Verification | Matches manufacturer specs | Affects cooling/heating efficiency |
| Electrical System Integration | Stable voltage and proper breaker | Prevents safety hazards and failures |
Take the Stress Out of HVAC Installation in Lake Jackson
Upgrading or installing a new HVAC system in your home can feel overwhelming. Issues like choosing the right unit size, guaranteeing energy efficiency, and making sure every component is installed correctly can keep you up at night. This guide outlined the complexities of system selection, ductwork preparation, and the importance of flawless installation for long-term comfort. But you should never have to tackle these challenges alone.
Explore our trusted Heating and Air Conditioning solutions for worry-free service.

Let Colley Refrigeration’s team handle every step of your HVAC journey with honesty, speed, and over 47 years of local expertise. We offer transparent pricing, emergency 24/7 service, and convenient financing—so you get dependable comfort without delay. Reduce risk and enjoy true peace of mind by letting us install and support your system the right way. Ready to make your home comfortable and energy efficient for every season? Get started now at Colley Refrigeration or see our HVAC maintenance tips and services to get the best from your investment.
Frequently Asked Questions
What factors should I consider when assessing my HVAC needs?
You’ll want to evaluate your home’s size, insulation quality, number of windows, ceiling height, and existing ductwork condition. Additionally, consider household comfort preferences and specific temperature sensitivities of family members.
How do I choose the right HVAC system for my home?
Select an HVAC system that aligns with your home’s unique requirements such as size, insulation, and airflow needs. Consider the type of system (central air, ductless mini-split, heat pump) and energy efficiency ratings, like SEER, to ensure optimal performance.
What is the importance of preparing the installation area for HVAC?
Properly preparing the installation area is crucial for efficient and safe system operation. Clear a space around the units, ensure the electrical supply can support the new system’s requirements, and verify that ductwork is in good condition to maximize airflow.
How do I verify optimal performance after HVAC installation?
Conduct comprehensive testing by checking operational sequences, measuring temperature differentials across different zones, and verifying refrigerant pressure and electrical system integration for consistent and reliable performance.