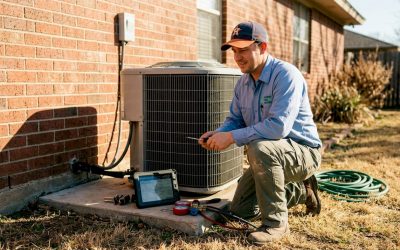
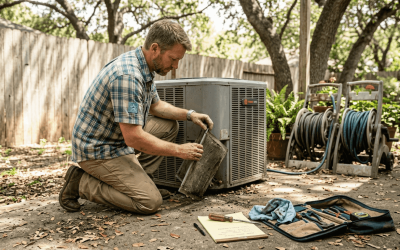
Every Texas summer puts your HVAC system to the test and so does every chilly winter night. Yet over 90 percent of homeowners admit they only think about their HVAC when it stops working. Most people believe regular maintenance is just about swapping out filters now and then. But there is a smarter routine that can actually help you avoid emergency breakdowns and slash your energy bills in ways you would not expect.
Table of Contents
- Step 1: Gather Necessary Tools And Materials
- Step 2: Inspect And Replace Air Filters
- Step 3: Clean HVAC Components And Exterior Units
- Step 4: Check And Calibrate Thermostat Settings
- Step 5: Perform System Testing And Verification
Quick Summary
| Key Point | Explanation |
|---|---|
| 1. Assemble core HVAC tools | Gather essential tools like wrenches, multimeters, and safety gear for effective maintenance and safety. |
| 2. Replace air filters regularly | Change air filters every 30 to 90 days to maintain system efficiency and improve indoor air quality. |
| 3. Clean HVAC components continuously | Regularly clean both indoor and outdoor components to prevent inefficiencies and extend equipment lifespan. |
| 4. Calibrate and test thermostat settings | Regularly verify and adjust thermostat settings to ensure accurate temperature control and energy efficiency. |
| 5. Document all maintenance activities | Keep a log of maintenance tasks and observations to track system performance and schedule future services. |
Step 1: Gather necessary tools and materials
Preparing for your HVAC maintenance requires strategic planning and assembling the right equipment to ensure a safe and efficient process. Before diving into the detailed maintenance work, having a comprehensive toolkit will streamline your efforts and help you tackle potential challenges more effectively.
Essential Tools for HVAC Maintenance
Your maintenance toolkit should include precision instruments that allow you to inspect, clean, and service your HVAC system comprehensively. According to U.S. Department of Energy, homeowners should gather specific tools to perform thorough system checks.
The core toolkit for HVAC maintenance includes several critical items:
- Adjustable wrench set for connecting and disconnecting components
- Screwdriver with multiple bit attachments for various connection types
- Multimeter for electrical testing and diagnostics
- Safety glasses to protect your eyes during inspection
- Work gloves to prevent potential injuries
- Flashlight or headlamp for examining hard-to-see areas
- Replacement air filters matching your specific HVAC system
- Fin comb for straightening bent air conditioning unit fins
- Compressed air canister for cleaning delicate components
Before beginning any maintenance work, verify that all tools are in good condition and readily accessible. Check that your wrench set is not rusted, screwdrivers have secure tips, and safety equipment is clean and undamaged. Organizing your tools beforehand prevents interruptions and allows for a more systematic approach to HVAC maintenance.
To help you prepare effectively, here is a table summarizing the essential HVAC maintenance tools, their purpose, and any special notes.
| Tool/Material | Purpose | Notes |
|---|---|---|
| Adjustable wrench set | Connect/disconnect components | Ensure no rust; correct sizes for your system |
| Screwdriver (multi-bit) | Fasten or remove connections | Use appropriate tip for each connection type |
| Multimeter | Electrical testing/diagnostics | Confirm proper function before use |
| Safety glasses | Eye protection | Check for scratches or cracks |
| Work gloves | Hand protection | Prevent injuries when handling sharp/dirty parts |
| Flashlight or headlamp | Illuminate inspection areas | Fully charged batteries or extra bulbs recommended |
| Replacement air filters | Maintain air quality/system | Match manufacturer size and type (see label on current) |
| Fin comb | Straighten AC unit fins | Use gently to avoid damaging aluminum fins |
| Compressed air canister | Clean delicate components | Only for non-electrical, dust-prone areas |
| Notepad & pen | Document observations/issues | Use for creating a maintenance and observation log |
Additionally, consider having a notepad and pen nearby to document any observations, unusual sounds, or potential issues you might discover during your inspection. This documentation can be valuable for future reference or when consulting with professional HVAC technicians.
Safety Precautions and Preparation
Before touching any HVAC components, always disconnect the power to your system at the circuit breaker. This critical safety step prevents potential electrical accidents and protects you from unexpected system activation. Wear comfortable clothing that won’t get caught in moving parts, and ensure you have adequate lighting in your work area.
If you are uncomfortable with any aspect of the maintenance process or encounter complex issues, it is always recommended to contact a professional HVAC technician who can provide expert service and prevent potential system damage.
Step 2: Inspect and replace air filters
Air filters represent the first line of defense in maintaining your HVAC system’s efficiency and indoor air quality. These critical components trap dust, allergens, and debris, preventing them from circulating through your home and potentially damaging your heating and cooling equipment. According to U.S. Department of Energy, regular filter maintenance is crucial for optimal system performance.
Understanding Filter Types and Location
Before beginning the replacement process, identify your specific HVAC system’s filter type and location. Most residential systems have filters located near the return air duct or inside the air handler unit. Typical filter sizes range from 16×20 inches to 20×25 inches, though exact measurements vary depending on your system’s specifications.
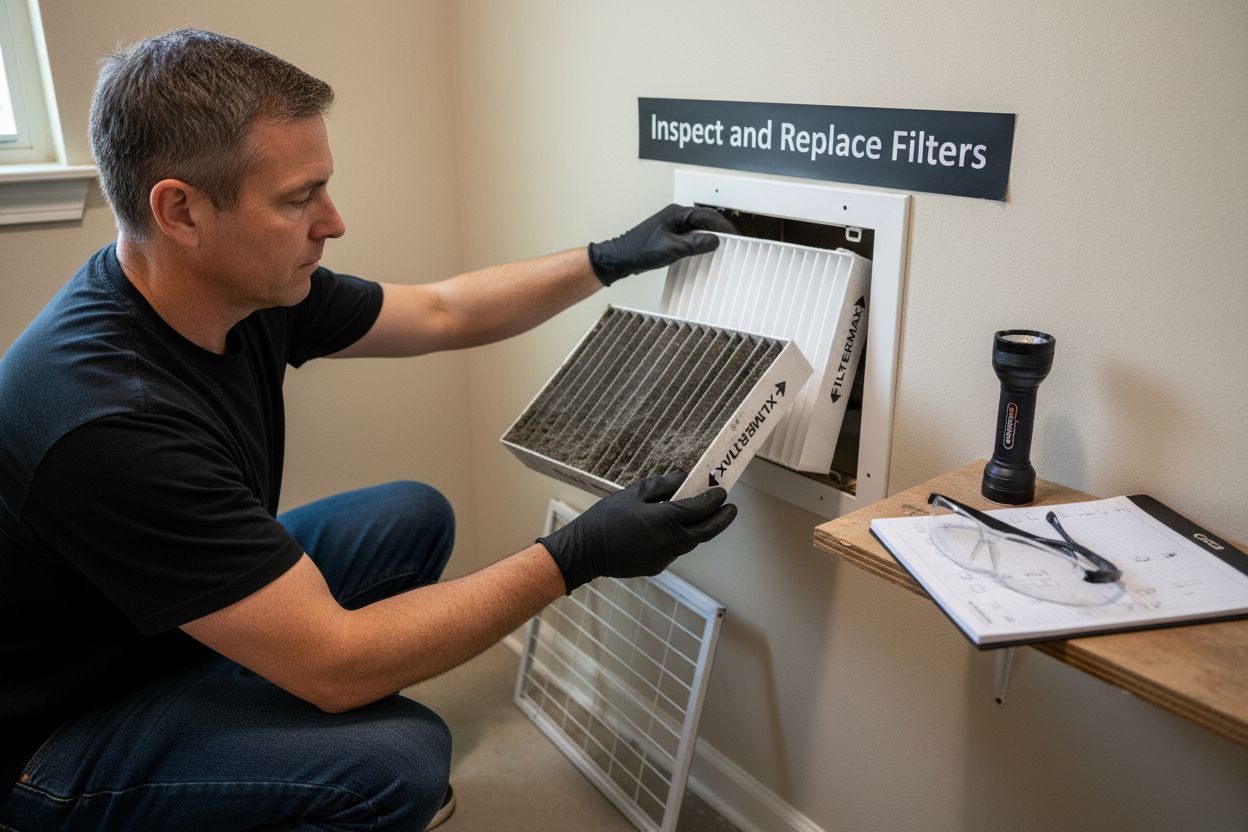
Carefully remove the existing filter by sliding it out of its housing. Pay close attention to the airflow direction arrow printed on the filter’s frame, which indicates the correct orientation for reinstallation. Never install a filter backwards, as this can significantly reduce system efficiency and air quality.
Filter Inspection and Replacement Process
Visually examine the removed filter for signs of excessive dirt accumulation, discoloration, or visible damage. A clean filter should appear white or light gray, while a dirty filter will look dark gray or brown with visible dust and debris. Factors influencing filter replacement frequency include:
- Home occupancy levels
- Number of pets
- Indoor air quality
- Local environmental conditions
- System usage frequency
For most residential environments, filter replacement every 90 days provides optimal performance. However, homes with pets, smokers, or residents with allergies might require more frequent changes every 30 to 60 days.
When selecting a replacement filter, match the exact size and type recommended by your HVAC manufacturer. Consider upgrading to high-efficiency filters with higher MERV ratings if you want improved air filtration. These advanced filters capture smaller particles and can help reduce allergens and indoor pollutants.
To install the new filter, slide it into the filter housing with the airflow direction arrow pointing toward the air handler. Ensure a snug, secure fit without gaps around the edges. Loose or improperly installed filters can allow unfiltered air to bypass the filter, reducing system efficiency and potentially causing damage.
After installation, record the replacement date on the filter or nearby maintenance log. This practice helps track replacement intervals and maintains a consistent maintenance schedule.
 Consider setting a smartphone reminder or marking your calendar to ensure timely future replacements.
Step 3: Clean HVAC components and exterior units
Cleaning your HVAC system’s components is a critical maintenance task that prevents inefficiency, reduces energy consumption, and extends equipment lifespan. Texas homeowners face unique environmental challenges that make thorough cleaning particularly important. According to U.S. Department of Energy, regular cleaning helps maintain optimal system performance.
Exterior Unit Maintenance
Begin by examining your outdoor condenser unit, which is most exposed to environmental debris. Turn off power to the unit at the circuit breaker before starting any cleaning process. Remove leaves, grass clippings, and other vegetation surrounding the unit, maintaining at least two feet of clear space. This prevents airflow obstruction and potential system strain.
Using a garden hose with a gentle spray nozzle, carefully rinse the condenser coils to remove accumulated dirt and dust. Avoid using high-pressure water, as this can damage delicate aluminum fins. If coils appear heavily soiled, consider using a specialized coil cleaner designed for HVAC systems. Gently straighten any bent fins using a fin comb, which helps restore proper airflow and heat exchange efficiency.
For those interested in more comprehensive maintenance techniques, our guide on air conditioner maintenance tips offers additional insights into keeping your system running smoothly.
Interior Component Cleaning
Moving indoors, focus on cleaning the blower compartment and return air vents. Start by removing vent covers and washing them with warm, soapy water. Use a vacuum with a soft brush attachment to remove dust and debris from the vent openings and surrounding wall areas. For the blower compartment, carefully vacuum accumulated dust, being cautious not to dislodge any electrical connections.
Pay special attention to the evaporator coil located inside the air handler. These coils can accumulate significant dust and potential mold growth. Use a soft, clean cloth or a specialized no-rinse coil cleaner to gently remove buildup. Avoid touching the coils directly to prevent damage to the delicate fins.
Your cleaning efforts should also include checking and cleaning the condensate drain line. A clogged drain can lead to water damage and system inefficiency. Pour a cup of white vinegar through the drain line to help clear minor blockages and prevent algae growth.
After completing the cleaning process, verify your work by turning the system back on and listening for any unusual sounds. Proper maintenance should result in smooth, quiet operation with consistent airflow. If you notice any persistent issues or feel uncomfortable with any steps, consulting a professional HVAC technician is always recommended.
Remember that consistent cleaning not only improves system performance but also contributes to better indoor air quality and potentially lower energy bills.
Step 4: Check and calibrate thermostat settings
Your thermostat serves as the command center for your home’s heating and cooling system, controlling temperature, comfort, and energy efficiency. A properly calibrated thermostat ensures your HVAC system operates precisely and economically. According to U.S. Department of Energy, regular thermostat maintenance can significantly reduce energy consumption.
Identifying Your Thermostat Type
Before beginning calibration, identify whether you have a traditional mechanical thermostat, digital programmable model, or modern smart thermostat. Each type requires slightly different maintenance approaches. Mechanical thermostats with physical dials are more prone to inaccuracies, while digital and smart models offer more precise temperature control.
Start by removing the thermostat cover carefully. Check for any dust accumulation or loose wiring that might impact performance. Gently clean interior components using compressed air or a soft brush, being cautious not to damage delicate electronic circuits.
Calibration and Accuracy Testing
To verify thermostat accuracy, conduct a comparative temperature test. Place a reliable digital thermometer next to your thermostat and compare readings. A difference of more than one to two degrees indicates potential calibration issues. For mechanical thermostats, you might need to adjust the internal anticipator or contact a professional for precise recalibration.
Programmable and smart thermostats offer more advanced calibration options. Review and update your programmed temperature schedules to match current household patterns. Consider creating separate weekday and weekend schedules that optimize comfort and energy efficiency.
Key considerations for thermostat programming include:
- Setting slightly higher temperatures during summer when home is unoccupied
- Lowering temperatures during nighttime in winter
- Creating gradual temperature transitions to reduce HVAC system strain
- Utilizing built-in energy-saving modes
For smart thermostats, take advantage of learning features that automatically adjust based on your behavioral patterns. Many models now offer smartphone app integration, allowing remote temperature control and detailed energy usage reports.
If you’re experiencing consistent temperature discrepancies or your thermostat seems unresponsive, it might be time for a replacement. Modern smart thermostats not only provide better accuracy but can also integrate with home automation systems and provide detailed energy consumption insights.
After completing calibration, verify your work by monitoring system performance over several days. Pay attention to temperature consistency, cycling frequency, and overall comfort levels. Unusual system behavior might indicate deeper calibration or potential HVAC system issues requiring professional inspection.
Step 5: Perform system testing and verification
System testing represents the critical final stage of HVAC maintenance, confirming that all previous efforts have successfully prepared your equipment for optimal performance. This comprehensive verification process ensures your system operates efficiently, safely, and reliably. According to U.S. Department of Energy, thorough system testing helps identify potential issues before they escalate into costly repairs.
Initial System Startup Procedure
Turn on your HVAC system by setting the thermostat to cooling mode and lowering the temperature by 5 degrees below the current room temperature. This triggers a complete system startup sequence. Listen carefully during the first few minutes of operation for any unusual sounds such as grinding, squealing, or excessive rattling. These sounds can indicate potential mechanical problems that require immediate professional attention.
Observe the airflow from various vents throughout your home. Each room should receive consistent, strong airflow without significant temperature variations. Weak or inconsistent airflow might suggest issues with ductwork, fan motor, or potential blockages discovered during earlier maintenance steps.
Performance and Efficiency Verification
Conduct a systematic evaluation of your system’s performance by monitoring several key indicators:
- Temperature differential between supply and return air
- Consistency of cooling or heating across different rooms
- System cycling frequency
- Energy consumption patterns
- Overall comfort levels
Use a digital thermometer to measure the air temperature emerging from supply vents. A properly functioning system should produce air approximately 15 to 20 degrees cooler than the room temperature during cooling mode. Significant deviations might indicate refrigerant issues or compromised system efficiency.
Pay special attention to the exterior condensing unit during this test. Observe its operational characteristics: it should run smoothly without excessive vibration, produce a consistent humming sound, and maintain a steady operational rhythm. Any erratic behavior suggests potential mechanical stress or component wear.
Your maintenance journey concludes with documentation. Record the date of maintenance, specific actions performed, and any observations during the testing phase.
Below is a troubleshooting table summarizing common HVAC problems that may arise during testing, their likely causes, and solutions recommended within the article.
| Problem | Likely Cause | Recommended Solution |
|---|---|---|
| Persistent unusual noises | Mechanical issues (fan, motor, etc.) | Contact a professional technician |
| Complete lack of airflow | Blocked filter or broken fan | Check and replace filter, call a professional if unresolved |
| Significant temperature inconsistencies | Duct issues or thermostat calibration | Inspect ductwork, recalibrate thermostat, or call a professional |
| System short cycling | Thermostat or system malfunction | Check settings and calibration, contact technician if needed |
| Unusual odors during operation | Mold, dust, or electrical problems | Clean coils, vents, and drain line; consult a professional for persistent issues |
| Weak/inconsistent airflow | Duct blockage or blower issue | Inspect vents, clean blower, check for obstructions |
| Temperature reading off | Thermostat miscalibration/dust | Clean thermostat, recalibrate/test, replace if necessary |
Warning Signs Requiring Professional Intervention
If you encounter any of the following during system testing, contact a professional HVAC technician immediately:
- Persistent unusual noises
- Complete lack of airflow
- Significant temperature inconsistencies
- System short cycling
- Unusual odors during operation
Remember that while DIY maintenance is valuable, complex HVAC issues demand professional expertise. Your thorough testing helps catch potential problems early, potentially saving significant repair costs and extending your system’s operational lifespan.
Take Control of Your HVAC Maintenance in Texas
Struggling to keep your HVAC system in peak condition can feel overwhelming, especially in the unpredictable Texas climate. If replacing filters, cleaning components, and checking thermostat settings sound familiar yet leave you wondering if your system will perform when you need it most, you are not alone. Even a well-followed checklist may not catch hidden issues that can threaten your comfort or safety. Now is the perfect time to level up your peace of mind with truly professional care.
Explore expert HVAC maintenance solutions made for Texas homes.

Why wait for your system to break down during a Lake Jackson heatwave? With Colley Refrigeration, you get trusted, upfront pricing and 24/7 emergency response from a team with over 47 years of experience. Schedule your tailored maintenance or repair visit today. Discover how our full suite of heating and air conditioning services keeps you protected all year. Act now to enjoy better comfort and the security of true local expertise.
Frequently Asked Questions
What tools do I need for essential HVAC maintenance?
To perform essential HVAC maintenance, you need tools such as an adjustable wrench set, multiple screwdrivers, a multimeter, safety glasses, and replacement air filters. Gather all required tools before starting to streamline your maintenance process.
How often should I replace my HVAC air filters?
You should replace your HVAC air filters every 90 days for optimal performance. However, if you have pets, smoke, or suffer from allergies, change filters every 30 to 60 days to maintain better air quality.
How can I clean my outdoor condensing unit safely?
To clean your outdoor condensing unit, first turn off the power at the circuit breaker and clear away debris for at least two feet around the unit. Then, use a garden hose to gently rinse the coils; avoid high-pressure water to prevent damage to the fins.
What should I check on my thermostat during maintenance?
During HVAC maintenance, check your thermostat for dust accumulation and perform a temperature accuracy test by comparing it to a reliable thermometer. Clean any debris inside, and recalibrate if necessary to ensure accurate temperature control.
What signs indicate that I need professional HVAC help?
Signs that you may need professional help include persistent unusual noises, a complete lack of airflow, significant temperature inconsistencies, or short cycling of the system. If you notice any of these issues during your system testing, contact a professional technician immediately.
How can I document my HVAC maintenance activities?
To document your HVAC maintenance activities, create a maintenance log where you note the date of service, actions performed, and any observations made during testing. This record will help you track performance and schedule future maintenance tasks effectively.
Recommended
- The Importance of Preventative Maintenance for HVAC Systems – Colley Refrigeration
- Understanding Why Schedule HVAC Maintenance Matters – Colley Refrigeration
- Understanding Air Condition Maintenance for Homes and Businesses – Colley Refrigeration
- 10 Essential Air Conditioning Repair Tips for Homeowners – Colley Refrigeration